Converting from cable reset to a late style pushbutton reset
By Richard Truett
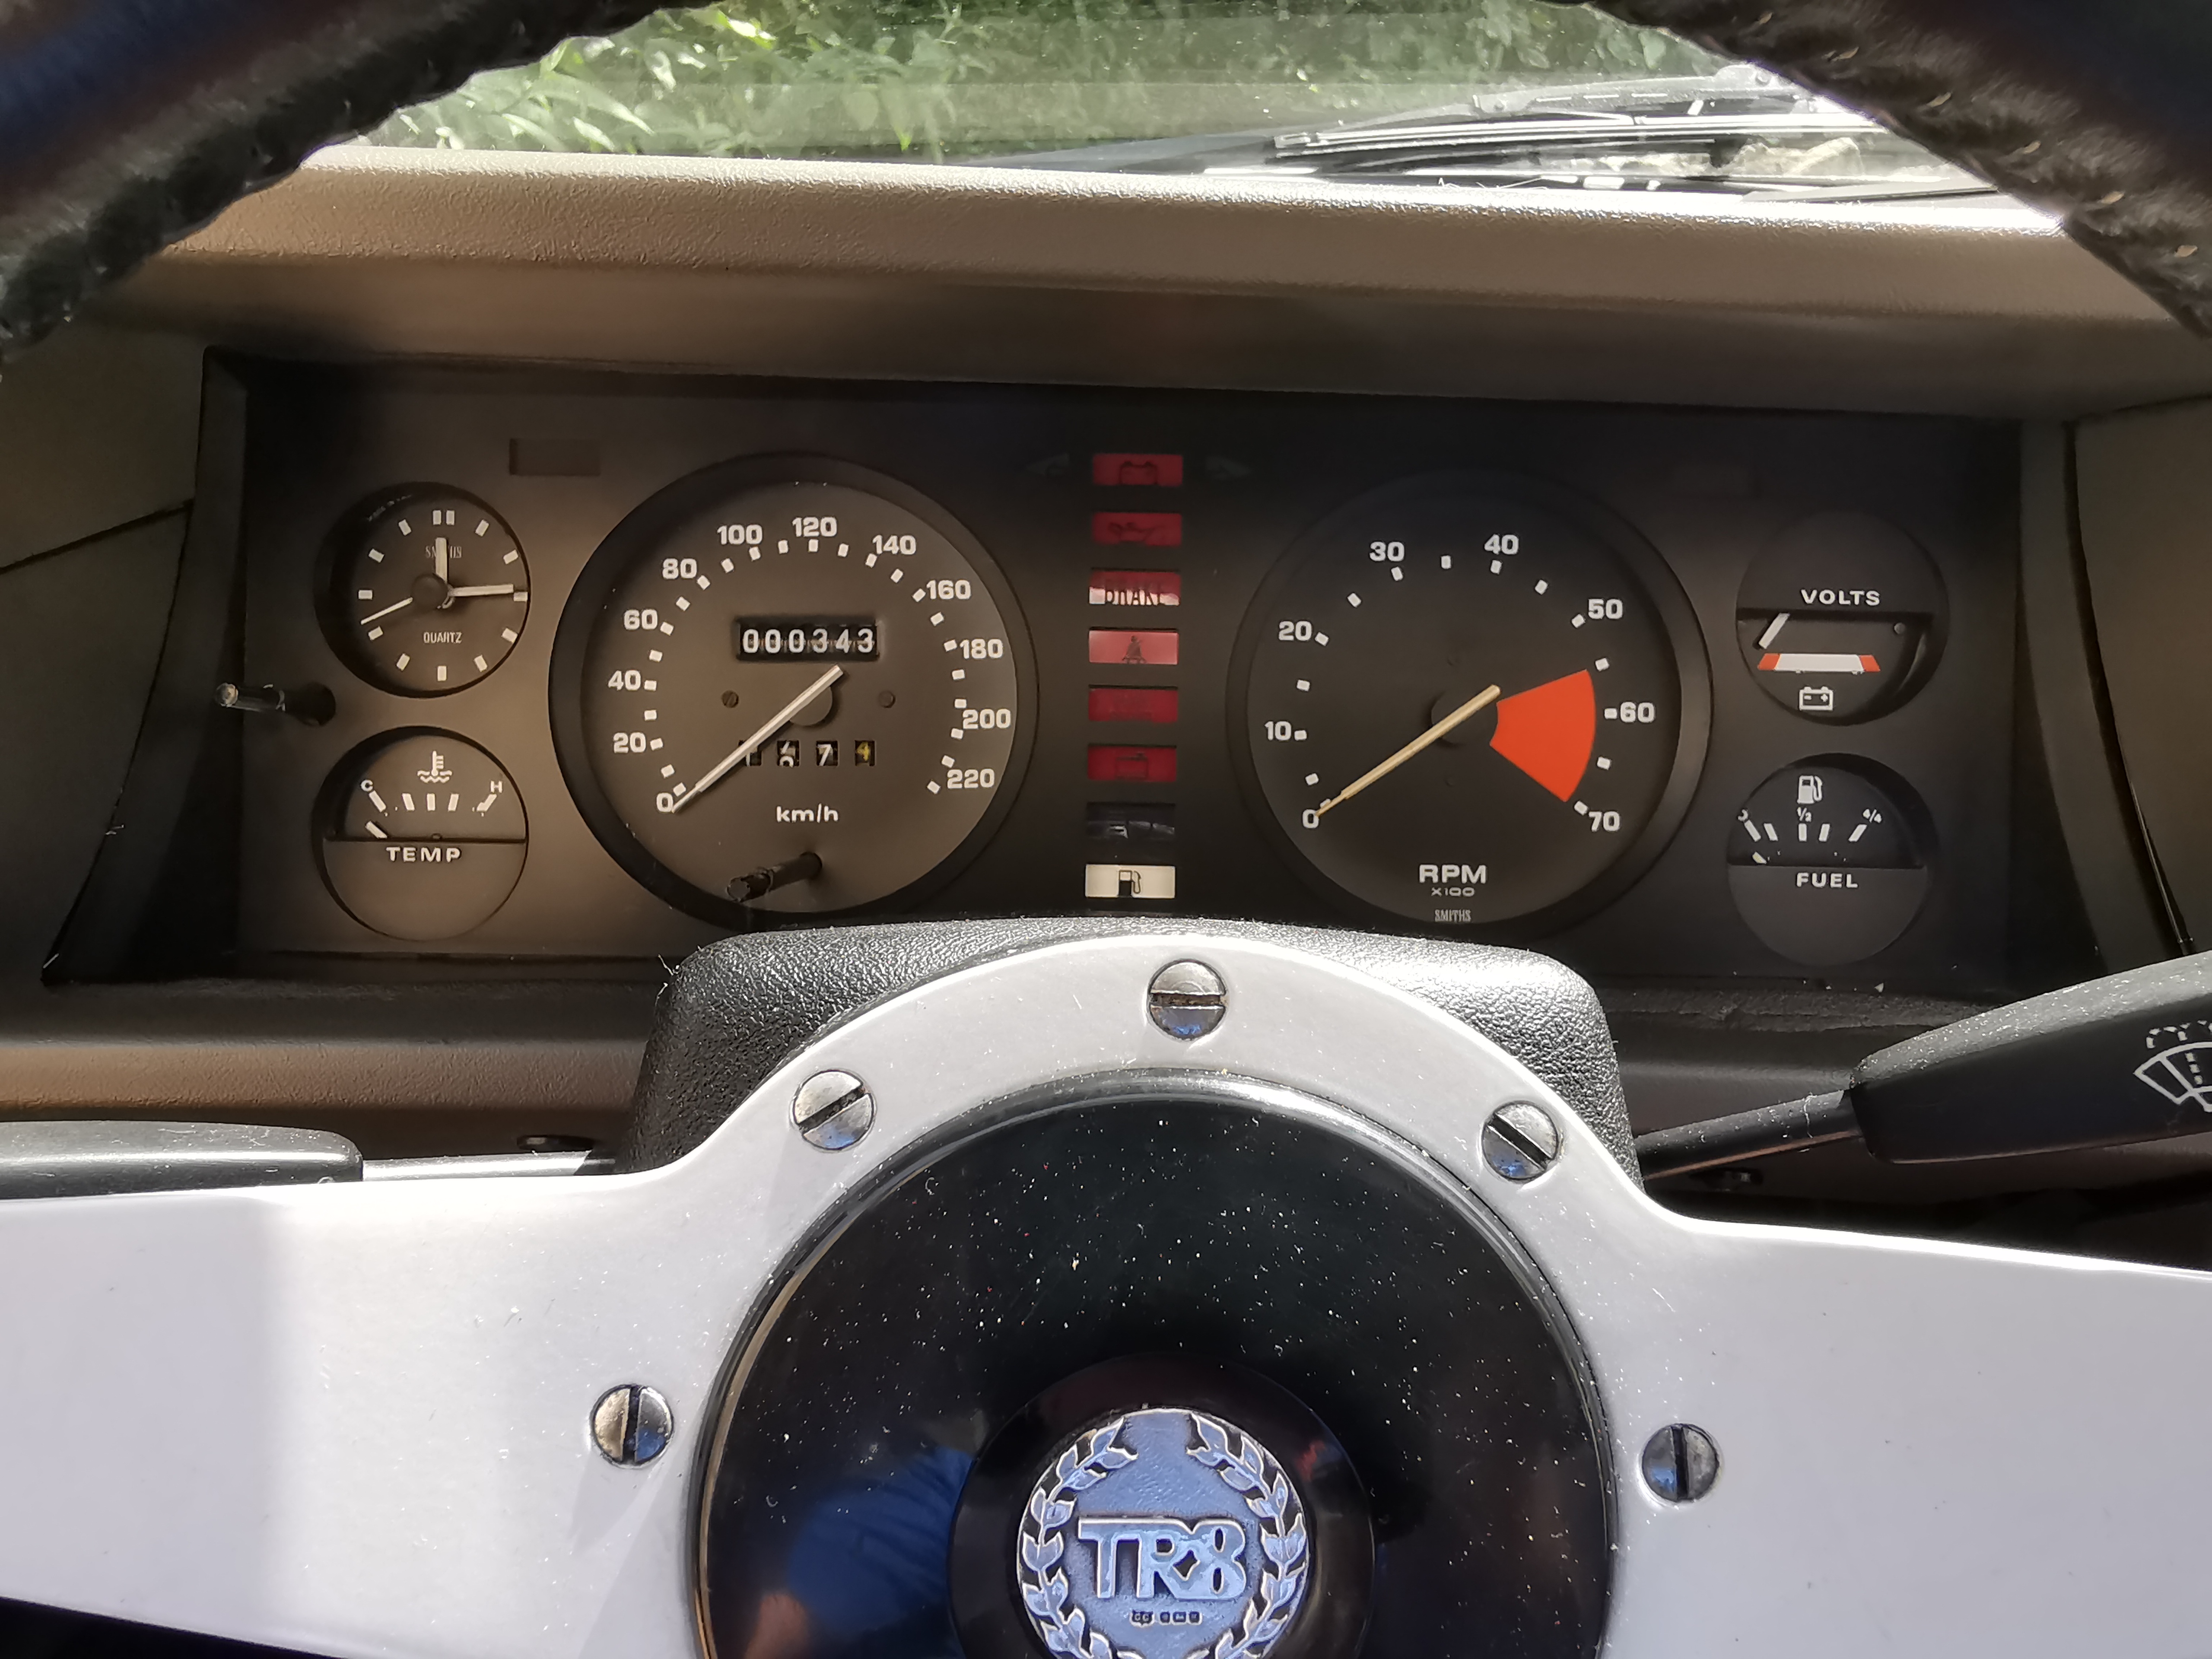
Later 81 Push Button Dash
I’ve always liked the pushbutton style of gauges used in some of the very late TR7s and TR8s. One of the last items on the list of things to do to my 1982 Canadian market TR7, which has been converted to full TR8 specs, was to change from the standard cable reset gauges to the pushbutton gauge pack.
On the surface, this looks like a fairly straightforward conversion.It is not.
But it can be done today if you have patience, a couple hundred dollars and the willingness to use a combination of new and second-hand parts (USED ONLY 2019).
A LITTLE HISTORY:
When the TR7 was launched in 1975, it came with a handsome set of Smiths gauges that featured white numbers on a black background bathed at night in soft green light. The cluster includes an electric clock — a first for a TR — in the upper left, a temperature gauge below it, the speedometer and tachometer in the middle and the volt and fuel gauges on the right. A row of warning lights divides the speedometer and tachometer. Two additional warning lights are located in the upper left and right on the cluster. The one on the left is for the choke or, for fuel injected models, the oxygen sensor, the one on the right is the rear screen demister light.
The clock and the trip odometer are controlled by two flexible cables routed just under the instrument fascia. To adjust the clock you turn the knob. The reset the trip odometer, you push in slightly and turn the knob to the right. The great majority of all TR7s and TR8s sold around the world came with this style e of instrument pack. Only the speedometer readout changed to meet local laws.
This instrument pack remained the same until the fuel injected 1981 cars arrived in the United States. Two instrument upgrades were in store for the final TRs. First, small pictographs with the international symbols for fuel, volts and temperature were added to the smaller gauges. Pictures also were added for most of the warning lights. Midway through the 1981 run, the cable resets for the clock and speedometer were replaced with long black pushbuttons that came through the clear plastic cover. Now, instead of the driver reaching under the dash to change the time or reset the odometer, he or she could do it by reaching straight ahead. With the pushbutton clock came a quartz movement to replace the transistor unit. Finally, all of the warning lights were in pictures on the last few cars.
It is unclear which cars were given the pushbutton reset gauge pack. I have seen the 50th to the last TR built (by serial number) a red TR7 convertible, and it did not have the pushbutton gauges. Yet virtually all 1981 model year TR8s did. My 1982 Canadian market TR7, the 168th to the last TR by serial number, came with the early style gauges cluster with no pictographs on the smaller gauges and no pictures in the warning light strip.
In any case, when I converted my car to TR8 specs last year, I knew that I would eventually install the late-type gauge pack. I made the conversion not so much for cosmetic reasons, but because it is important to me that the car’s true original mileage be showing on the speedometer in the car and that the speedometer be the correct type for a 1982 TR8.
When I brought my TR7 into the USA from Canada, I had to change the original KPH speedometer to MPH to satisfy U.S. Customs officers, who are not in a very charitable or forgiving mood these days. After having made the speedometer change, my car’s original mileage was no longer showing. And that bothered me greatly.
So, first, I obtained a new pushbutton speedometer in MPH. These are readily available (Much harder to find July 2019) new for less than $50 from most vendors. U.S. models came with a ridiculous 80 mph speedometer. I took a little license here and bought a 130 mph speedometer. When I received the speedometer, I took it to a repair shop and had the mileage set to 58,546, the total miles the car has covered since new. That cost an additional $66. Then I purchased a new Smiths quartz pushbutton clock.
I knew I would need a pushbutton type instrument mask — the black cover that goes underneath the clear plastic cover — and a new plastic cover with the holes drilled for the pushbuttons.
I thought it would be a simple matter of dropping in the new gauges and buttoning up the cluster. But when I took apart my old gauge package, I was surprised to find that the new speedometer and clock would not just fit into place.
The quartz clock is shaped differently than the transistor model; it’s round, not square. Also, the pushbutton speedometer does not have the three mounting ears to hold it in place like the cable reset units. When I checked the parts book, I found that there is different case used for the later instrument pack. Fortunately it is still available new. Further digging turned up three additional parts needed: a pushbutton type printed circuit board, a new flexible mounting drive for the speedometer and a new speedometer cable.
Once I had all the parts, it took about two hours to make the conversion.
First you start by removing all the old gauges from the old cluster. Then you take off the old printed circuit board to obtain the screws and clips needed to attach the board to the new instrument panel case. This is a very simple procedure. The only caveat is that one should make sure the connections are good. The printed circuit board differs only in the area where the clock is installed. Someone good with electrical circuits may be able to adapt the older style circuit board.
Once the circuit board is installed, you remove the lights from the old gauge pack and put them in the new one. You also have to switch the green plastic diffusers, which are located near the speedometer and tachometer. After that, you put in the warning lights, which are held in place by plastic pegs. Then you screw in the new flexible mounting drive. In goes the speedometer and the rest of the gauges. Next comes the instrument panel mask and then the clear plastic cover. Once it is all together, it is ready to be installed in the car.
The final item that needs attention is the speedometer cable, which has a different attachment at the speedometer end.
If you can find a complete pushbutton style instrument pack, the swap would be straightforward with only the speedometer cable needing to be changed.
Listed below are the parts you’ll need for the conversion, along with their original British Leyland/Austin Rover part numbers. Some parts are still available new from the usual TR stockists.
Parts list:
— AEU1809: Instrument panel case, pushbutton type. This the bare case. No warning lights, flexible drive plate or other items included. Available new from Rimmer Bros. and Roadster Factory.
— AEU1810: Clear plastic instrument panel cover. Available new or as a used item. (USED ONLY 2019) Try Rimmer Bros S&S or Robsport.
–AEU1811: Printed circuit board, Available only as a used item (USED ONLY 2019). Try Rimmer Bros, S&S, Wedge Factory, or Robsport.
–AEU1630: Pushbutton reset speedometer, KPH. Available new (USED ONLY 2019) Try Rimmer Bros, S&S, Wedge Factory and Robsport.
–AEU1631: Pushbutton reset speedometer, MPH. Available new (USED ONLY 2019) Try Rimmer Bros, S&S, Wedge Factory and Roadster Factory.
–AEU1635: Smiths quartz pushbutton reset clock. Available new (USED ONLY 2019) Try Rimmer Bros, S&S, Wedge Factory and Roadster Factory.
–AEU1661: Gauge mask, contains hole for clock pushbutton reset. Available new (USED ONLY 2019) Try Rimmer Bros, S&S, Wedge Factory and Roadster Factory.
–Flexible mounting drive plate: No part number available. Used only. It is possible to adapt the old drive plate by cutting off the end and gluing the plastic speedometer adapter to the case.
–GSD388: Late type speedometer cable. Available new (USED ONLY 2019) from Rimmer Bros, S&S, Wedge Factory, Roadster Factory, Robsport and others.